Add Dispatch Form in the Inventory View Section
The Add Dispatch Form allows clients to initiate the dispatch process for selected inventory items. This feature streamlines the transfer of inventory from one location to another by selecting the desired warehouse and providing dispatch details.
Steps to Use the Add Dispatch Form
- Navigate to Inventory View Section
- Go to the Inventory tab in the dashboard.
- Click on the "Add To Dispatch" Icon
 to send a items for dispatch. You will find notification top of dashboard
  once you add all product to dispatched click this icon and processed.
 - Example: "To Dispatch (1 ITEM)" indicates there is one item pending for dispatch.
Inventory Details to dispched
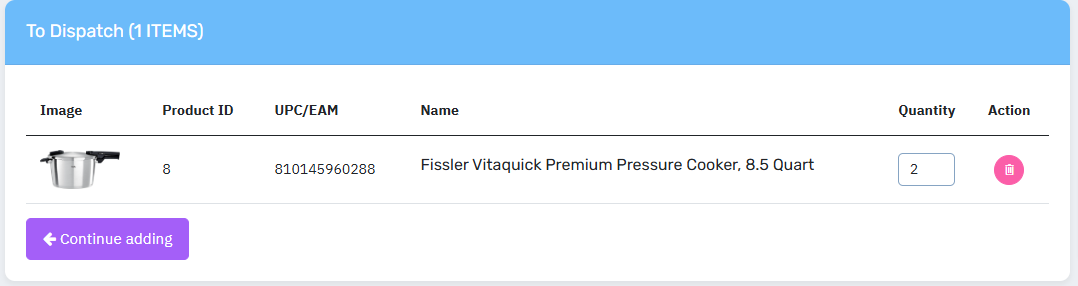
Field Explanations
- Image
- A visual preview of the product to confirm identity before dispatch.
- Example: Image of the Fissler Vitaquick Pressure Cooker.
- Product ID
- Unique identifier assigned to the product for tracking purposes.
- Example: "8".
- UPC/EAN
- Universal Product Code (UPC) or European Article Number (EAN) for the product.
- Example: "810145960288".
- Name
- The full product name.
- Example: "Fissler Vitaquick Premium Pressure Cooker, 8.5 Quart".
- Quantity
- Number of items to be dispatched.
- Example: "2" unit.
- Action
- Clicking icon
 "Delete" to delete any item from the list.
- Clicking icon
Dispatch Summary Section
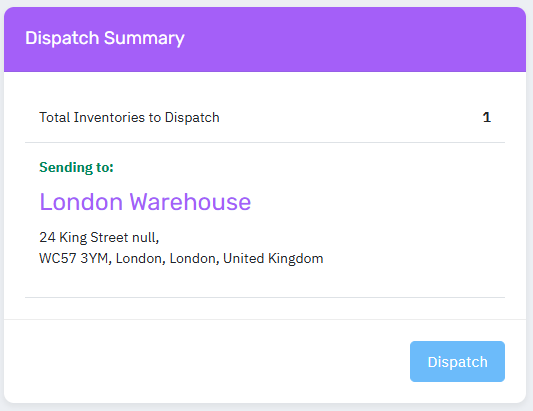
- Total Inventories to Dispatch:
Displays the number of items selected for dispatch.- Example: "1" item ready for dispatch.
- Warehouse address where you select to dispatched item
- once you click dispatched button it will bring the page where all your dispatches are
to view your all depatches click on dipaches → view all → click view icon  it will bring this view
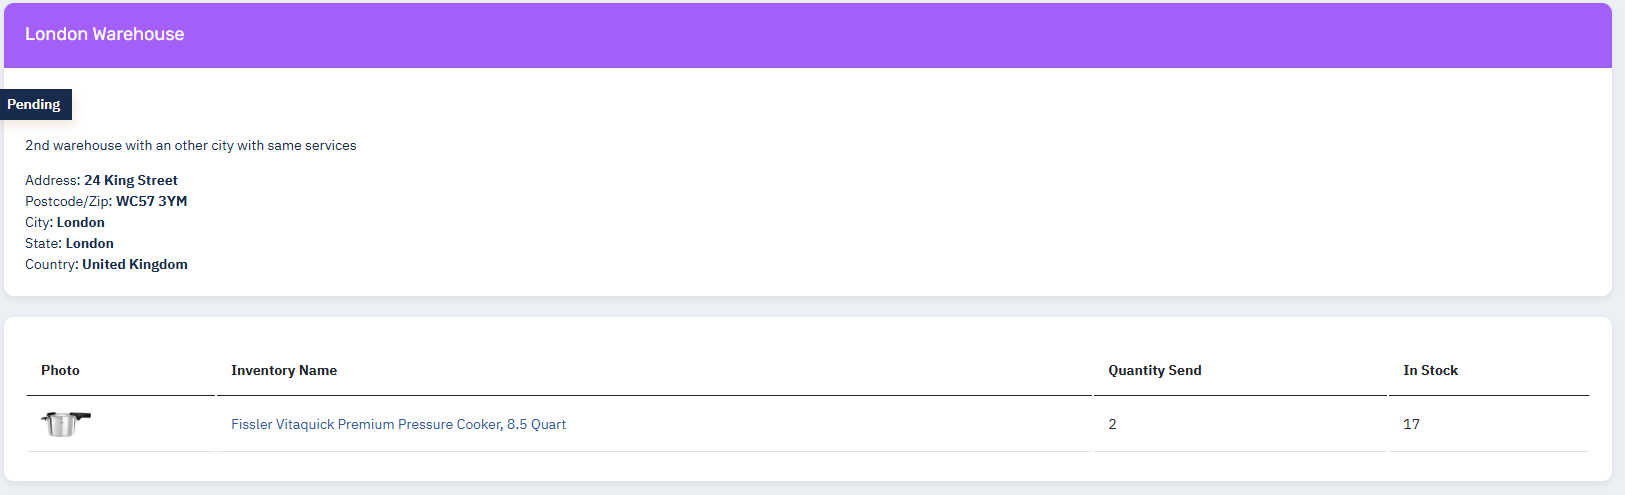
Important Note About Dispatch Status:
Pending Status: The dispatch request remains "Pending" until the warehouse accepts it.
Warehouse Processing Time: The warehouse may take time to approve the request, especially if they need to ensure:
- Available Space for the dispatch.
- Required Services are operational.
How to Add Tracking Details After Warehouse Approval
Once the warehouse approves your dispatch request, you need to provide tracking details for your goods. This allows the warehouse to know when your goods will arrive. Here's how to do it:
Step-by-Step Guide
Receive Notifications:
- After the warehouse approves your dispatch request, you will:
- See a notification on your dashboard under the Notification Section.
- Receive an email confirmation of the approval.
Access Dispatch Details:
- Go to Manage Dispatches on your dashboard.
- Click View All to see the list of all your dispatches.
Locate Approved Dispatch:
- Find the dispatch that has been approved by the warehouse in status it shows Accepted
 .
. - Click the View Icon
 next to the approved dispatch to access its details.
Add Tracking Details:
- In the dispatch details, you will find an option to Add Tracking Details.

- Enter the required information about your shipment, such as:
- Courier Name
- Tracking Number
- Estimated Arrival Date
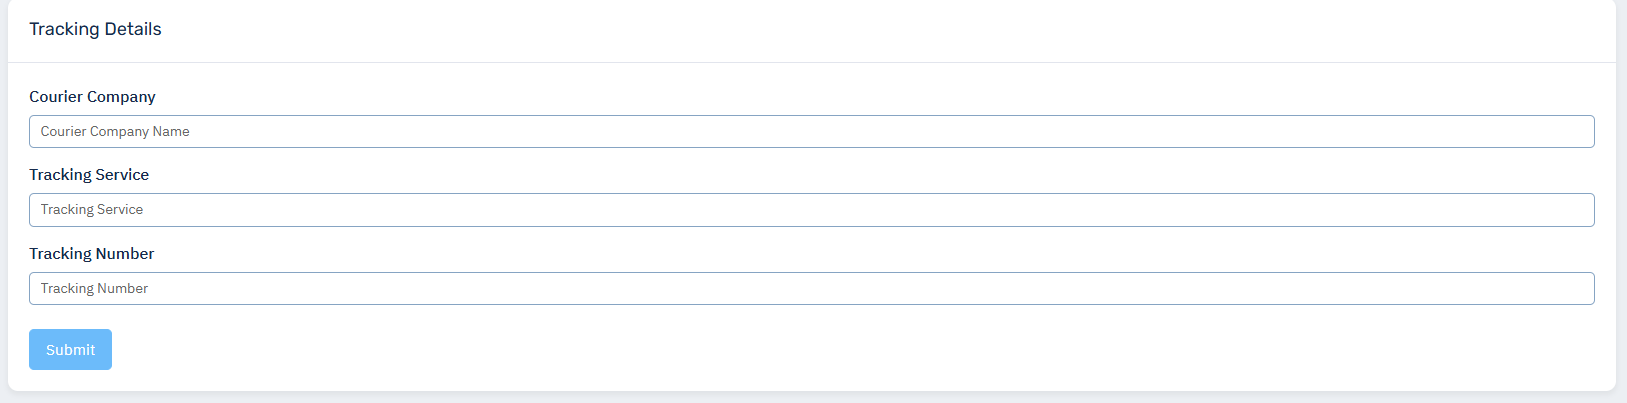
Submit Tracking Details:
- Save and submit the tracking details.
Warehouse Notification:
- The warehouse will receive your tracking details and prepare for the arrival of your goods.
Important Notes
- Timely Updates:
- Ensure you add the tracking details immediately after approval to avoid delays.
- Accurate Information:
- Double-check the courier name and tracking number to ensure the warehouse has the correct information.
- Monitoring Shipments:
- Keep an eye on your shipment’s progress and notify the warehouse of any changes to the delivery schedule.
By providing accurate tracking details, you help the warehouse manage your goods efficiently.
Rejected Requests:
- If the selected warehouse cannot accept the dispatch request, you will be notified via:
- The Notifications Section on your dashboard.
- Your registered email.
- In such cases, you will need to choose another warehouse to proceed with sending the inventory.
Warehouse Selection
- Select Warehouse
- Dropdown menu to choose the target warehouse for dispatch.
- Example: "Select Warehouse in your desired location".
- Country
- Dropdown list of available countries.
- Example: "-- Select Country --".
- City
- Dropdown list to select the city where the warehouse is located.
- Example: "-- Select City --".
- Warehouse
- Final selection of the specific warehouse for the dispatch.
Canceling Requests:
- While the dispatch is in "Pending" status, you can cancel the request directly from the View All section.
- Use this feature to withdraw or modify dispatches before warehouse processing begins.
Purpose of the Add Dispatch Form
- Streamlined Inventory Movement: Simplifies transferring inventory between warehouses.
- Accurate Tracking: Ensures proper tracking by associating dispatch with specific warehouses and cities.
- Operational Efficiency: Reduces errors by providing clear instructions and minimizing manual handling.
The form enhances logistics management by allowing clients to efficiently plan and execute their dispatch operations.
Add New :
By clicking add new it will bring you the
- Inventory View Section
- Click on the "Add To Dispatch" Icon to send a items for dispatch. You will find notification top of dashboard
 once you add all product to dispatched click this icon and processed.
- Click on the "Add To Dispatch" Icon
Example: "To Dispatch (1 ITEM)" indicates there is one item pending for dispatch